Setup of jupyter nb env with conda (Windows)
Setup of dependencies for python code development can be frustrating. No fits-all
solution is available. However, using conda and a environment.yml-file offers one of
the most robust approaches. A *.yml file tells conda which dependencies (i.e. packages)
with the exact version to install and from where (that is: conda channels).
This post describes how to setup a conda environment for running this Jupyter notebook. To start, download the example *.yml file:
Install conda
You can install Conda in Linux and Windows. For Linux instructions, see this post. The instructions below describe how to installall/use conda in Windows
If you haven’t done so far, you can either install Anaconda or Miniconda. Miniconda is suitable if you only want the package manager. I suggest using Choco to install Miniconda3 in Windows:
choco install miniconda3 --params="'/AddToPath:1'"
This will install conda and add it to your Path. In other words, whenever you open
a Windows command line and type conda, it will be available.
I update conda always manually with conda update -n base conda. The following command
will prevent choco to upgrade conda automatically:
choco pin add -n=miniconda3
Afterwards, open a cmd window and type:
conda --version
It should show something like this: conda 4.7.12
Update conda package manager to the latest release with:
conda update -n base conda
Here, “base” is the base environment of conda.
A good practice is to never touch the base environment except for conda updates. For all other package installs, create an explicit environment.
Conda basics
You can create a new conda env from scratch with the following command:
conda create --name jupyter_testenv
Afterwards, activate it with:
conda activate jupyter_testenv
Everything you do now will be done inside the activated env. For example, it is a good practive to install pip inside every conda env:
conda install pip
If you run pip afterwards, it will be used from within the env:
pip install requests
Generally, you should avoid installing packages with pip if they’re available on conda. E.g., the better command would be:
conda install requests
Use channels
Conda has several channels from where packages can be installed. You should not mix packages from different channels in the same env.
The most famous channel is conda-forge, a community managed conda channel. Usually, most of my conda envs contain packages installed from conda-forge.
conda install pip -c conda-forge
conda install requests -c conda-forge
Check the output of any install operation. If you see that a large list of packages was formerly installed from the base channel, and you issued -c conda-forge, all existing packages in the env will be reinstalled from conda-forge.
This may not be what you want. Either always use -c conda-forge or never inside one env. It is also recommended to never mix packages from multiple channels.
Sometimes, you must install packages with pip because they’re not yet on conda. You can do this and most of the time it will work (depending on the package).
However, while conda update --all -c conda-forge will update all packages in the env installed with conda , not those installed with pip - you must update pip dependencies manually (e.g. pip install --upgrade requests).
Install packages from existing environment file (.yml)
Once conda is installed, download environment_ipynb.yml to a folder.
Have a look at the files’s contents:
name: jupyter_env
channels:
  - pyviz
  - conda-forge
  - defaults
dependencies:
  - python
  - jupyterlab
  - fiona
  - geoviews
  - shapely
  - hvplot
  - geopandas>=0.5.0
  - pandas
  - holoviews
  - cartopy
  - pyproj
  - rtree
  - numpy
  - matplotlib
  - emoji>=0.5.1
  - hdbscan>=0.8.20
  - gdal
  - attrs
  - seaborn
  - descartes
  - regex
  - scipy
  - tagmaps
The first line contains the name of the environment to create. Then channels are listed - note that these are ordered, e.g. conda-forge has a higher priority than the anaconda default channel.
Following this, packages are listed with minimum version requirements. Therefore, if newer versions are available, conda will install these latest available versions. This provides some flexibility.
Sometimes conda won’t install the latest versions, depending on your OS and other factors. Most of the time, fall back to older versions happens when there’re conflicts between different package dependencies.
To install these dependencies, open the Anaconda prompt:
either press Windows and type
anaconda prompt(if you installed anaconda)or, if conda is on your
PathEnvironment (if you followed the miniconda approach described above), go to the folder where you downloaded the*.yml, hold downShift-Key and Right-Click. You will either see an entryOpen Power Shell Window hereorOpen command line Window here. Both of these work. Here’s a screenshot: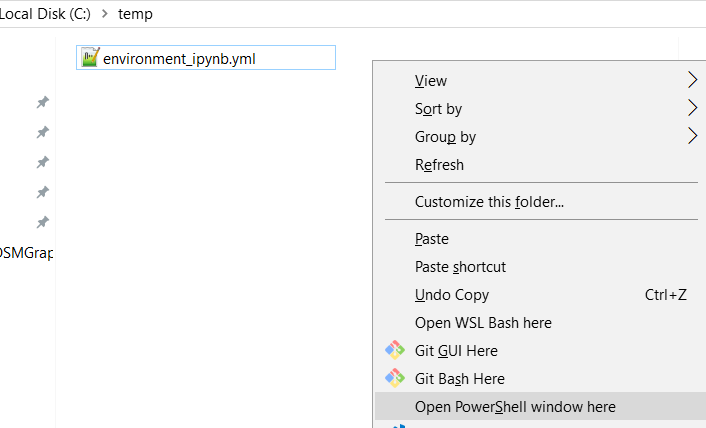
In (Ana)conda prompt (or command line/ console/ bash), run the following command:
conda env create -f environment_ipynb.yml
Make sure you provide the full path to the downloaded file, e.g. /c/temp/environment_ipynb.yml.
Conda will now resolve dependencies and create the environment with the name jupyter_env.
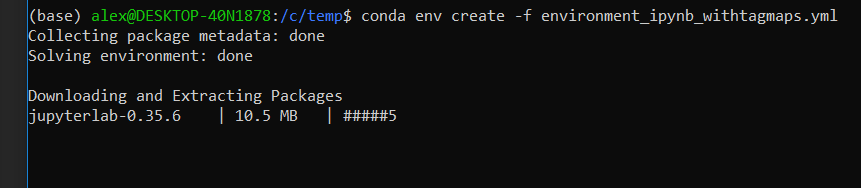
You can use this approach to re-create the environment on any platform. In the screenshot
below, I am creating the environment inside of WSL (Windows Subsystem for Linux)
running Ubuntu 18.04:
Once conda finished, activate the env by running:
conda activate jupyter_env
The command line will change and show jupyter_env at the beginning, indicating
that you’re now working within this environment. Start Jupyter Lab Server by typing
jupyter lab and hit Enter.
Optional: Install Jupyter labextension
The notebook may ask you to install the jupyter labextension. You can do this in the console with active jupyter_env:
conda activate jupyter_env
jupyter labextension install @pyviz/jupyterlab_pyviz
In case you happen to use WSL as well, make sure to close all Jupyter Lab instances and restart the WSL shell and jupyter_env before issuing this command, otherwise you might stumble into this issue.
Open Jupyter Lab
Type:
jupyter lab
to open jupyter lab in your browser.
Troubleshooting
First, check what’s on your Path in Windows:
- click start (or hit the ⊞ Win-Key)
- type “Environment”, select “Edit the system environment variables”
- select “Environment Variables..”
- under system variables, search for the entry for Path
- click edit and check the list of folders and the order.
E.g. if you type
pythonorcondain your cmd, Windows will go through this list of folders and the firstpython.exeorconda.exefound will be used. - Notes:
- you only need one python system installation
- if you use conda, you don’t need to install python
- if you use miniconda, you don’t need anaconda
Show existing conda envs:
conda env list
Show list of packages in current conda env with:
conda activate jupyter_env
conda list
Remove conda env and all packages in this env with:
conda remove --name jupyter_env --all
Make sure that you’re on the latest conda version:
# this command needs to be executed without any active env
conda update --name base conda