Part I: Setup Dev Environment in Windows 10/11
I’ve decided to split the blog post on setting up a dev environment in Windows 10/11 and WSL into 3 1/2 parts:
- Part I: Setup Dev Environment in Windows
- Part IIa: Windows Subsystem for Linux (WSL)
- Part IIb: WSL & Docker setup
- Part III: Installation of additional packages and tools in WSL
These blog posts serve as ongoing updated notes on how I configured my Windows 10/11 and WSL environment. It’s also a way to describe the tools I use as part of my daily work.
Things change frequently here, whenever I spot a better way of doing things, I’ll update these blog posts to remember how I did it. If you follow my examples, make sure to check version numbers - sometimes the official installation guides have been updated and this may not be reflected here.
Windows 10
Some general settings:
- Windows Sound Scheme: “No Sound”
- For easier access to frequently used folders, tools and drives:
- Taskbar / right-click / add toolbar / “This PC”
- right click / use small taskbar icons and disable text/title
- add Win7 Quick Launch bar: Taskbar / right-click / add toolbar /
%APPDATA%\Microsoft\Internet Explorer\Quick Launch
- Taskbar / right-click / add toolbar / “This PC”
- Remove User Folders (3D Objects and other silly stuff):
- get remove-userfolders-win10.reg
- open it and uncomment any user folder you want to keep (Documents and Pictures is commented out - i.e. kept)
- run it - stupid user folders gone 👍
- Make Windows 10 accept file paths over 260 characters (source:
- Windows Bloatware & Privacy settings:
- I apply the
Standardsettings from https://privacy.sexy/ (Github Repo), to get a minimum set of privacy in Windows 10/11
- I apply the
- Disable Windows Search completely: The Windows Search indexer uses a lot of resources. I don’t use Windows Search, since the early days of Windows in the 1990s, Windows Search has never worked for me. It was not capable of finding even and direct simple file name matches. I use bash in WSL1 to search my Windows partitions.
- Open File Explorer
- Right-click on your hard drive(s) (Usually C), and click Properties.
- Uncheck the box next to
Allow files on this drive to have contents indexed in addition to file properties. - Click on OK.
Chocolatey
For managing and updating my Windows Software, I prefer Chocolatey package manager. Choco will configure everything without manual need to intervene - default settings are mostly following the principle of sane defaults, which means: choose whats least interrupting.
To install Chcolatey:
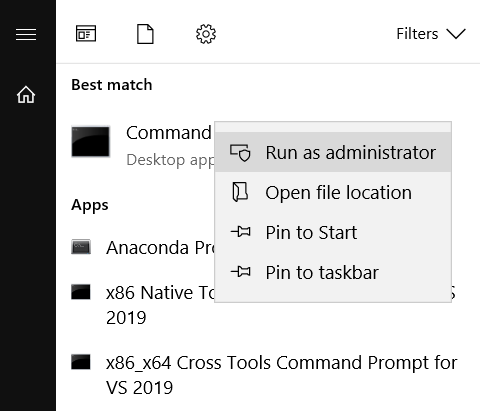
- Open cmd with administrator privileges:
- in Windows 10, click on start (or hit the ⊞ Win-Key), type “cmd”, right click on Open Command Prompt and select “Run as Administrator”
- in Windows 10, click on start (or hit the ⊞ Win-Key), type “cmd”, right click on Open Command Prompt and select “Run as Administrator”
- enter the following command (taken from the choco installation instructions):
@"%SystemRoot%\System32\WindowsPowerShell\v1.0\powershell.exe" -NoProfile -InputFormat None -ExecutionPolicy Bypass -Command "iex ((New-Object System.Net.WebClient).DownloadString('https://chocolatey.org/install.ps1'))" && SET "PATH=%PATH%;%ALLUSERSPROFILE%\chocolatey\bin"
- Once choco is installed, restart the administrator console once to make
chocoavailable as a command - Now you can install packages, e.g. Firefox with
choco install firefox - I suggest using choco for any software install on Windows, simply run
choco upgrade all -Yonce a week to keep all your software up to date
Create a shortcut “Choco Update All”
To create a shortcut to update all Windows Software installed with choco, create a shortcut (e.g. on Desktop) and add the following target:
C:\Windows\System32\cmd.exe /K "choco upgrade all -Y"
In addition:
- right click/ properties/ advanced
- Check “Run as Administrator”
Further, at TUD, we are required to submit a list of all installed software daily to a central unit, using GLPI. I don’t like the GLPI agent running all the time in the background, which is why I disabled it to send a manual update through my choco-update-all shortcut every morning, after updates are finished:
C:\Windows\System32\cmd.exe /K "choco upgrade all -Y && cd C:\Program files\GLPI-Agent && glpi-inventory --json > inventory.json && glpi-injector --verbose --debug --file inventory.json --url https://glpi.tu-dresden.de/marketplace/glpiinventory/"
The tools I use
The following is a list of tools I installed with choco and the additional settings for some:
- Browsers:
I prefer having a variety of browsers, for different purposes and testing
googlechrome(->choco install googlechrome)- disable password, language, autfill etc.
- install momentum (default screen)
- extensions:
- momentum
- I still don’t care about cookies
- Note: the original extension was bought by Avast; better avoid
- Privacy Redirect
- uBlock Origin
- Allow in Incognito Mode
- disable push notifications:
- chrome://settings/content/notifications (copy & paste this link, direct click is disallowed)
- Scroll down and click Advanced
- Click content settings
- Click Notifications
- Next to the Ask before sending (recommended) text, click the toggle button. It should now say Blocked.
- set standard language to English:
- Chrome will automatically display in the default system language for your computer.
- chrome://settings/languages
- Next to the language you’d like to use, click “Move to the Top”.
- disable “Google Translate”
- disable “Payment Methods”
- disable “Addresses and more”
- disable “Google Password Manager”
- disable “Sites can ask for your Location”
- disable “Ad topics”
- disable “Site-suggested ads”
- disable “Ad measurements”
- shortcuts:
- CTRL+SHIFT+S - Capture Full Size Webpage Screenshot
- webshare.io Extension: For avoiding the increasingly used geoblocks, I prefer a SOCKS5 Proxy over VPN because it is more lightweight. The webshare.io proxy service offers a dropdown selection for quickly chosing the country to proxy to.
firefox- same extensions and settings as for chrome
- I generally follow the recommendations for Firefox setup from Digitalcourage
- Specific settings:
- “Bookmarks toolbar”: Never show
- type
about:config- set
browser.urlbar.autoFill.adaptiveHistory.enabledtotrue- this will enable URL autocomplete as it is available in Chrome
- set
chromiummicrosoft-edgeedge://settings/languages>Use writing assistance> SelectBasicedge://flags/#edge-show-feature-recommendations> DisableShow feature and workflow recommendations- Disable/Remove “discover” Button:
regeditHKEY_LOCAL_MACHINE\SOFTWARE\Policies\Microsoft- add a key (folder)
Edge, addDWORDwith nameHubsSidebarEnabledand a value of0. - in Edge, go to
edge://policyand click onReload Policies
- Prevent microsoft-edge from hijacking PDF-Default-App 1:
reg add "HKLM\Software\Policies\Microsoft\Edge" /v "AlwaysOpenPdfExternally" /t REG_DWORD /d "1" /f reg add "HKLM\Software\Policies\Microsoft\Edge" /v "ShowPDFDefaultRecommendationsEnabled" /t REG_DWORD /d "0" /fmullvad- I added this browser recently to my list and now use it in combination with their VPN Service ($5/month), which lets me avoid geoblocking and also provides the best privacy
- my choice was based on a quick review of Hacker News comments and this blog post
- under
about:preferences#privacy, enable (at least) thesafermode (no js on http sites, media is click-to-play)
docker-desktop(software virtualization)adobereader- Adobe Acrobat PDF Reader- Hide bookmark and tools pane by default:
- Go to Edit > Preferences > Documents, and then select “Restore last view settings when reopening Documents”.
- Open a PDF document in Reader, and then collapse the Tools pane.
- Click OK. Relaunch Acrobat Reader. Acrobat Reader now remembers the state of the Tools pane.
- Hide bookmark and tools pane by default:
keypirinha(awesome tool to quick open any app with Alt+Space)- type “kconfig” in keypirinha, to open User Config File, add:
[app] hotkey_run = Alt+Space launch_at_startup = yes - I also add manual shortlinks to webpages I often need to open, with a trick
- e.g.
microsoft-edge:http://localhost:4444(my Docker-based pgadmin) - type this into the Keypirinha search box, add a keyword, e.g.
#pg, press enter - now, whenever you want to open the webpage again, just type the keyword:
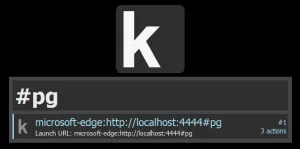
- e.g.
- type “kconfig” in keypirinha, to open User Config File, add:
nextcloud-client- the Windows nextcloud-client can be buggy after a new release
- I usually pin stable versions and update manually
choco install nextcloud-client --version=3.17.3 -y choco pin add -n=nextcloud-client #prevent it from being accidentally updated ... choco pin remove -n=nextcloud-client #once a fix is availablenotepadplusplus(quick text editor)- vscode-dark2015 style: https://github.com/Ludomancer/VS2015-Dark-Npp
- store to
%APPDATA%\Notepad++\themes - activate
global background colorin settings
- store to
- markdown-zenburn language: https://github.com/Edditoria/markdown-plus-plus
- store to
%APPDATA%\Notepad++\userDefineLangs
- store to
- under
Preferences / BackupdisableRemember current session for next launch - under
Preferences / New Document, selectUnix (LF)for the standard Format Line ending - Settings / Preferences / Language > “Replace Tab by Space”
- Plugins:
- Compare
- DSpellCheck
- JSON Viewer
- JSTool
- MarkdownViewer++
- vscode-dark2015 style: https://github.com/Ludomancer/VS2015-Dark-Npp
choco install irfanview --package-parameters="'/assoc=1'", for image file association- also remove the default Windows “Photo App”:
- Elevated Powershell:
Get-AppxPackage -allusers *photos* | Remove-AppxPackage
- Elevated Powershell:
- add 64-bit Plugins to
C:\Program Files\IrfanView\Plugins
- also remove the default Windows “Photo App”:
libreoffice-stillchoco install libreoffice-still- stable, less frequently updated libre office version
vlc(videos)keepass(password manager)- Options
- Lock workspace after 1200 seconds
- enable lock global workspace inactivity
- enter master key on secure desktop
- Shortcut: CTRL+Alt+D
- Turn off “Play UAC sound when switching to secure desktop” (Advanced Menu)
- extension: KeeAgent for auto ssh authentication
choco install keepass-plugin-keeagent
- Options
7zip-zstd- the
-zstdvariant includes modern compression algorithms such as Google Brotli
- the
Putty(SSH agent)WinSCP(file transfer)- to restore settings, import Site List from backup (
WinSCP.ini)
- to restore settings, import Site List from backup (
windowsfirewallcontrol- This little app is not intrusive and provides the ability to block unwanted outgoing connections for certain programs and generally monitor traffic.autohotkey- I have two ahk scripts, one for creating folders (date:
YYYY-MM-DD), with Alt+F, and one for creating files (default:notes.md), with Alt+N - see the gist
- I have two ahk scripts, one for creating folders (date:
spacesniffer(awesome tool to identify how your drive space is used)opensans(default font)font-awesome-font(best icon font)rclone- I use rclone to sync/copy files from Google Drive (often shared manuscripts etc. by colleagues) to my local drive
- Getting a GDrive token requires installing rclone in Windows with chocolatey first
- I then use rclone in WSL to sync/copy files, e.g.:
rclone copy gdrive:"Documents" ./ --bwlimit 4325k -P -v --drive-shared-with-me
python(system python, but its rarely used)vscode(code editing)- accept install WSL extension
- test
code .in wsl - Settings File Locations
- in Windows, the user settings file is located here:
%APPDATA%\Code\User\settings.json- you can also hit
CTRL+Shift+Pand enterPreferences: Configure Language Specific Settings(select any language) - currently, my settings.json file looks like this
- one of the most important settings is
"files.eol": "\n",, which will use Linux style linebreaks in Windows (Git & WSL compatibility)
- one of the most important settings is
- I also use the VS Code Extension
Settings Syncto sync mysettings.jsonto a private Gist on Github (called “cloudSettings”)- use SHIFT + ALT + U to upload settings
- use SHIFT + ALT + D to download settings (e.g. after a reinstallation of VS Code)
- Note: as long as Issue 979 is not fixed, this will not work in WSL Remote Development
- in Windows, the user settings file is located here:
- extensions (WSL - my main development):
- autoDocstring
- Docker
- GitLens
- pgFormatter
- PostgrSQL
- pyright
- python
- Settings sync
- shfmt
- Install dependency with
curl -sS https://github.com/mvdan/sh/releases/download/v3.4.3/shfmt_v3.4.3_linux_amd64 | bash
- Install dependency with
- Gruvbox Themes > Gruvbox Hard (Dark)
- extensions (Windows):
- Settings Sync
- connect to github gist settings
- Night Owl
- Remote - Containers
- Remote - SSH
- Remote - WSL
- Remote Development
- Python
- Bracket Pair Colorizer
- Vetur (Vue specific)
- JavaScript (ES6) code snippets (Vue specific)
- Settings Sync
thunderbird(mail client)typora(markdown docs renderer)- File > Preferences.. > Editor
- LF (Unix Style) Line Endings
- File > Preferences.. > General > Open Advanced Settings > conf.user.json
- Add Custom Key Binding for Source Code Mode:
 // Custom key binding, which will override the default ones.
"keyBinding": {
    // for example:
    // "Always on Top": "Ctrl+Shift+P"
    "Source Code Mode": "Ctrl+Shift+M",
},
- File > Preferences.. > Editor
dexpotto switch between multiple virtual desktopsdrawiofor diagram and schema drawing- add fontawesome icon set:
- File / Load Library..
- https://cdn.jsdelivr.net/gh/webketje/drawio-font-awesome@online/FontAwesome
- add fontawesome icon set:
openvpnminiconda3choco pin add -n=miniconda3to pin version- I update conda always manually with
conda update -n base conda - follow instructions for some more specifics how I work with conda below
qgis(alternative GIS), Plugins:Get WKT- WKT Feature ConversionQuickMapServices- Basemaps, see the list.Terrain Shadingplugin for modelling natural illumination over digital terrain models
oldcalc(Windows 7 calculator)jcpicker(color picker)obs-studiofor audio & screen recordingscreentogiffor screencast recording (output to*.webmor*.gif)visualstudio2019community- for development of some windows based interfaces, I sometimes still require Visual Studio (instead of VS Code)
- after chocolatey installation, further extensions
are required that will be automatically installed
upon first load of a solution:
.NET Desktop Development (5 GB)
zotero- disable sync
- set “Base directory” (Preferences > Advanced > Files and Folders) to local literature folder
- set PDF View to “System default” (Preferences > General > “Open PDFs using..”)
- Enable recursive quick search in folders: go to Preferences > Advanced > Config Editor, search for
recursiveCollections, double click (set to True) - use CTRL-SHIFT-DRAG to drop files into Zotero as Links, see #77
- use CTRL-Shift-C to copy bibliography to clipboard
- Dark Theme:
- since Zotero 7, a native Dark Mode is available (Settings > General), so below steps are End Of Life (EOL)
- Go to
%AppData%\Zotero\Zotero\Profiles\(XXXXXXXX.default) - Create
chromefolder - Place the
userChrome.css - Start Zotero
- Add-Ons:
- zotero-pdfkit
- allows to modify/select a “default” PDF attachment to be opened
- ZoteroDuplicatesMerger
- easier merging of duplicates
- zotero-folder-import
- bulk import PDFs from a folder
- zotero-tag
- allows to add stars to items (Num Key
1,2,3etc.):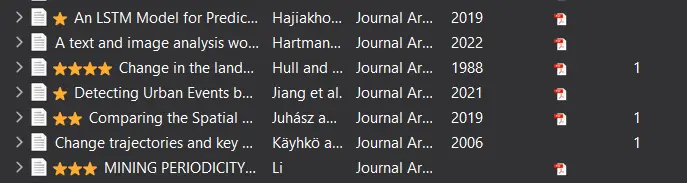
- allows to add stars to items (Num Key
- zotero-pdfkit
inkscapefor editing SVGs and creating logos- PDF Tools:
- Since Adobe is pushing a more aggressive stance for monetization of Acrobat, I am trying to replace selected PDF workflows with OSS. Here are some of the tools I use.
- qpdf
- removing passwords, unlocking PDFs, conversion
- install in WSL with
apt-get install qpdf - remove password with
qpdf --decrypt --password="" input.pdf output.pdf
- PDF4QT - Open Source PDF Editing
- Deleting, Sorting, Extracting Pages
- Currently, no choco release available, must be installed manually from PDF4QT/releases
LibreOffice Draw,Inkscape- editing PDFs, adding text (e.g. filling forms)
Mupdf- Command line tool and Python package for parsing, filling forms, adding text
SumatraPDF- the best PDF tool of all
- Viewing of PDFs and adding annotations (highlight, comment etc.)
- it is much faster than Adobe Acrobat
- pdfplumber
- Awesome python package to extract tables from PDFs into data pipelines. Use with Jupyter Lab.
- PDF X-Change viewer,
choco install pdfxchangeviewer- for manual OCR of pages/PDFs
- adding text via typewriter (forms)
Click here to see: Remove all Microsoft "Apps" (bloatware)
I don’t use these apps. Run in elevated powershell:
Get-AppxPackage -allusers *photos* | Remove-AppxPackage
Get-AppxPackage -allusers *3dbuilder* | Remove-AppxPackage
Get-AppxPackage -allusers *windowsalarms* | Remove-AppxPackage
Get-AppxPackage -allusers *windowscalculator* | Remove-AppxPackage
Get-AppxPackage -allusers *windowscommunicationsapps* | Remove-AppxPackage
Get-AppxPackage -allusers *skypeapp* | Remove-AppxPackage
Get-AppxPackage -allusers *getstarted* | Remove-AppxPackage
Get-AppxPackage -allusers *zunemusic* | Remove-AppxPackage
Get-AppxPackage -allusers *windowsmaps* | Remove-AppxPackage
Get-AppxPackage -allusers *solitairecollection* | Remove-AppxPackage
Get-AppxPackage -allusers *bingfinance* | Remove-AppxPackage
Get-AppxPackage -allusers *zunevideo* | Remove-AppxPackage
Get-AppxPackage -allusers *bingnews* | Remove-AppxPackage
Get-AppxPackage -allusers *onenote* | Remove-AppxPackage
Get-AppxPackage -allusers *windowsphone* | Remove-AppxPackage
Get-AppxPackage -allusers *windowsstore* | Remove-AppxPackage
Get-AppxPackage -allusers *bingsports* | Remove-AppxPackage
Get-AppxPackage -allusers *soundrecorder* | Remove-AppxPackage
Get-AppxPackage -allusers *bingweather* | Remove-AppxPackage
Get-AppxPackage -allusers *xboxapp* | Remove-AppxPackage
Miniconda
I maintain separate miniconda installations in WSL and Windows. Mostly I use conda in WSL these days, but for some software I have to use conda in Windows (e.g. TagMaps, due to the graphical interface that cannot run in WSL). It is likely you will only need one conda installation (in WSL).
- there’s a separate blog post that explaines installation of conda and tagmaps in Windows
In WSL, I like to move the folder that contains all created conda environments to an external location, for persistence. This is done via symlinking. This works on both Linux and Windows. Below commands are for Linux WSL.
cd ~
ls -alh miniconda3/envs/
cp miniconda3/envs /d/conda/
rm -rf miniconda3/envs
ln -s /d/conda/envs miniconda3/envs
# test
conda env list
# also good, once in a while
conda clean --all
SSH
- create a private ssh-key-pair with puttygen (protected by a good password)
- Export SSH Key with puttygen, two different ways:
- Windows: to
%USERPROFILE%\.ssh\id_rsa- use Keepass - KeeAgent Plugin for SSH key access, settings:
- Tools/options:
- Cygwin socket file
C:\Users\[User]\Documents\cyglockfile(replace [User]) - Msysgit socket file
C:\Users\[User]\Documents\syslockfile(replace [User])
- Cygwin socket file
- Linux/WSL:
- Linux: Conversions/Export OpenSSH key
- see this blog post
- for VSCode Remote SSH Key connections:
- Go to Options > KeeAgent, then scroll down to Agent Mode Options and activate
Enable agent for Windows OpenSSH (experimental): (default: disabled)- this enable an SSH agent socket compatible with the built-in Windows 10 SSH client.
- in VSCode, use F1 and type
Remote: SHow Remote Menu>Connect to Host> enter your user and remote hostuser@111.111.111.11and connect - the key will be unlocked from KeeAgent in KeePass through the Windows SSH Agent
- start working in local VSCode on any remote server/folder
- hint: if the user who owns files is someone different to the user you used to ssh into your remote machine,
add the ssh user to the file-owner’s group, e.g.
sudo usermod -a -G examplegroup sshuser && su sshuser, then usesudo chmod g+wto allow editing by group members for selected folders
- hint: if the user who owns files is someone different to the user you used to ssh into your remote machine,
add the ssh user to the file-owner’s group, e.g.
- Go to Options > KeeAgent, then scroll down to Agent Mode Options and activate
cmd
Command line is your friend. Either open it with Keypirinha and cmd or type ⊞ Win + R and then cmd (confirm with CTRL+SHIFT+Enter for elevated permissions).
These are my most used other commands in the Run-Dialogue:
cmd             # Command Line
services.msc    # Services
taskmgr         # Task Manager
taskschd.msc    # Task Scheduler
eventvwr.msc    # Event Viewer
shell:startup   # automatic startup apps
ncpa.cpl        # The old "network connections" that is hard to reach in Windows 11
gpedit.msc      # Group Policies
rsop.msc        # Microsoft Management Console/ Group Policies currently active
gpresult /r     # RSOP data, Group Policies Results
firefox.exe -P  # firefox profile manager
regedit         # Registry Editor
%temp%          # C:\Users\[USER]\AppData\Local\Temp (clean up)
msconfig        # System configuration (disable services startup)
diskmgmt.msc    # Disk Management (formatting, partitions etc.)
hdwwiz.cpl      # Device manager
winver          # Windows version information
Netspeedmonitor
I like to have a quick glance at netspeed throughput, netspeedmonitor is a great tool but it is not available for Windows 10.
For Windows 11 I prefer the alternative OpenNetMeter
Before installing it, install dotnet-6.0-desktopruntime with chocolatey:
choco install dotnet-6.0-desktopruntime
In order to autostart OpenNetMeter with elevated rights, use the Task Scheduler.
Alternative: Windows 10
The latest msi of Netspeedmonitor is available on various sites, e.g..
It can be installed with Compatibility mode in Windows 10.
- Right-click on the .msi installer file
- Go to Properties
- Go to the Compatibility tab
- Click “Change settings for all users”
- Tick “Run this program in compatibility mode for:”
- Choose “Previous version of Windows” in the drop-down menu
- Click OK and run the installer
- Now to run NetSpeedMonitor on startup:
- Go to
C:\Program Files\NetSpeedMonitor - Right click on nsmc.exe
- “Send to” “Desktop (create shortcut)”
- Go to Desktop and move the shortcut to
%appdata%\Microsoft\Windows\Start Menu\Programs\Startup
- Go to
Microphone and Video privacy settings (Windows Education)
Now this is Windows Education specific and it caused me some headache:
I could neither use Microphone nor Video recording, which was caused by some default privacy settings hidden deeply.
- Open the Group Policy Editor (⊞-key and enter
gpedit.msc) - Go to Computer Configuration > Administrative Templates > Windows Components > App Privacy
- Select “Let windows apps access the microphone”, enable (should be on already))
- Select “Let windows apps access the camera”, enable (should be on already))
- In the “default for all apps” box, set: User is in control (default: DenyAll) for both (microphone and camera) -> means that users may change the privacy setting using the Settings application.
- Now go to
Windows + Ikey- Enter “privacy” in search, select “Microphone Privacy”
- should indicate “Microphone Access for this Device is On”