Detailed installation guide
This detailed installation guide is for users who are not familiar with python package managers. The guide demonstrates installing tagmaps in Windows 10 and Miniconda3. Miniconda3 is available for Linux and macOS, too - in this case, substitute initial steps.
Install Chocolatey
If you don't have conda package manager installed, I recommend installing it with Chocolatey package manager for Windows. Chocolatey will configure everything without your need to intervene.
To install Chcolatey:
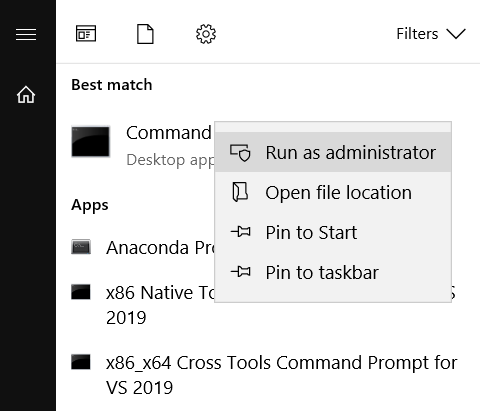
- Open cmd with administrator privileges:
- in Windows 10, click on start (or hit the ⊞ Win-Key), type "cmd", right click on Open Command Prompt and select "Run as Administrator"
- in Windows 10, click on start (or hit the ⊞ Win-Key), type "cmd", right click on Open Command Prompt and select "Run as Administrator"
- enter the following command (taken from the choco installation instructions):
@"%SystemRoot%\System32\WindowsPowerShell\v1.0\powershell.exe" -NoProfile -InputFormat None -ExecutionPolicy Bypass -Command "iex ((New-Object System.Net.WebClient).DownloadString('https://chocolatey.org/install.ps1'))" && SET "PATH=%PATH%;%ALLUSERSPROFILE%\chocolatey\bin"
- Once choco is installed, restart the administrator console once
- (I suggest using choco for any software install on Windows, simply run
choco upgrade all -Yonce a week to keep all your software up to date)
Install Miniconda
You can either install Anaconda or Miniconda. Miniconda is suitable if you only want the package manager. To install Miniconda3 with Choco in Windows, type:
choco install miniconda3
Now Miniconda is installed, you can either use the "Anaconda Prompt" to install packages, or add conda to your Path. The latter can be problematic if you have many different Python Versions installed (e.g. such as Python 2.7 and 3.6). However, since I only use conda for all my python work, it is convenient enough for me.
To add conda to your Path:
- click start (or hit the ⊞ Win-Key)
- type "Environment", select the following:
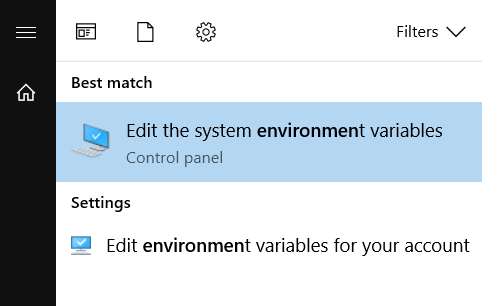
- type "Environment", select the following:
- select "Environment Variables.."
- under system variables, search for the entry for Path:
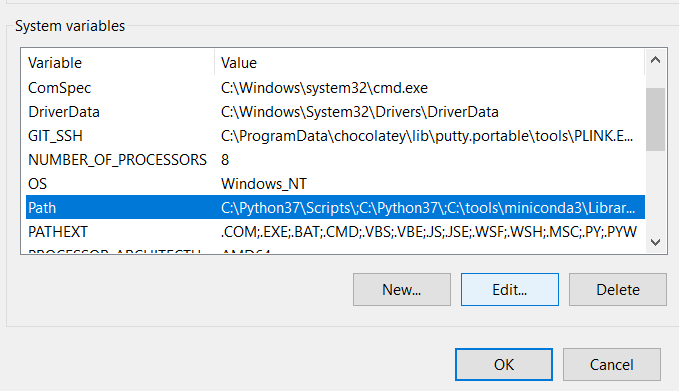
- click edit, add the following entries to the top of the list:
C:\tools\miniconda3\Library\mingw-w64\binC:\tools\miniconda3\Library\usr\binC:\tools\miniconda3\Library\binC:\tools\miniconda3\Scripts
It will look something like this:

Adding folder to Path means that if you type commands in the console (cmd), Windows will go through each folder and search for matching executables (exe´s). For example, if you type conda do-something, it will look for a conda.exe to do-something.
In the above picture, I've moved my still existent main Python installation above conda, meaning that if I type python do-something, it will first use the main Python exe.
Create an Environment for tagmaps package
You can install Tagmaps in the conda base environment, but it is always better to organize python packages in separate environments that can be used separately for separate projects.
To create a new conda environment:
- either open Anaconda Prompt
- or console/cmd (if you added conda to Path
- check if you have the latest version of conda package manager with
conda update conda - afterwards, type
conda create -n tagmaps_env -yto initialize a new env called tagmaps_env
Note that it does not matter where your prompt/console is opened (e.g. C:/temp/ or C:/Windows/system32 etc.). The conda environment will always be created in C:\tools\miniconda3\envs.
Install Tagmaps
- first, activate the environment that was just created by typing:
conda activate tagmaps_env - add conda-forge to the list of channels (for this env only):
conda config --add channels conda-forge- conda-forge is a community managed branch of anaconda packages
- install tagmaps in
tagmaps_envwithconda install tagmaps -y
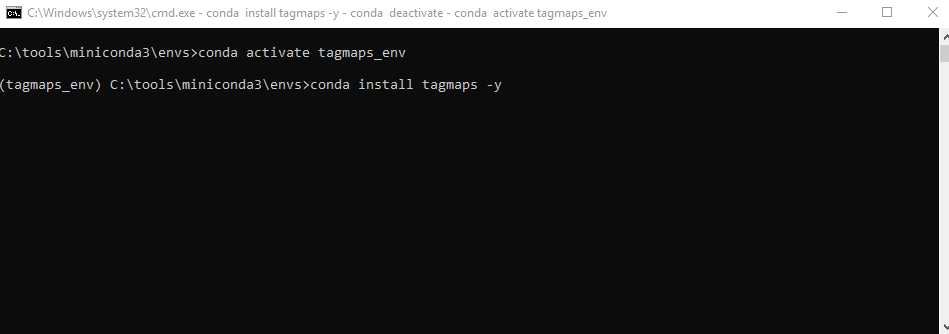
This will install tagmaps package and all dependencies to tagmaps_env.
Test Tagmaps
To verify it the package install works:
- go to the resource folder on Github Tagmaps
- download the folders
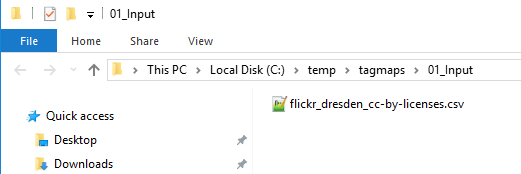
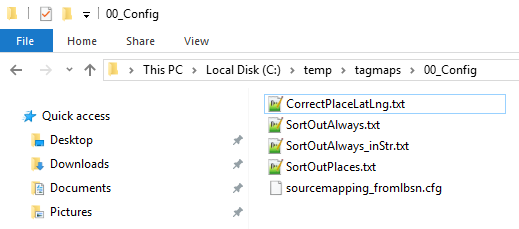
01_Inputand00_Configand its contents somewhere, e.g.:01_Input:
00_Config:
- go one folder up, hold down
Shiftand right click somewhere - either select Open Power Shell Window here or Open command Window here
- you may also open
Anaconda promptor cmd console (⊞ Win-Key) - and then change into your working dir by
cd C:\temp\tagmaps(e.g.)
- you may also open
- type
conda activate tagmaps_env - then type
tagmapsand hit enter
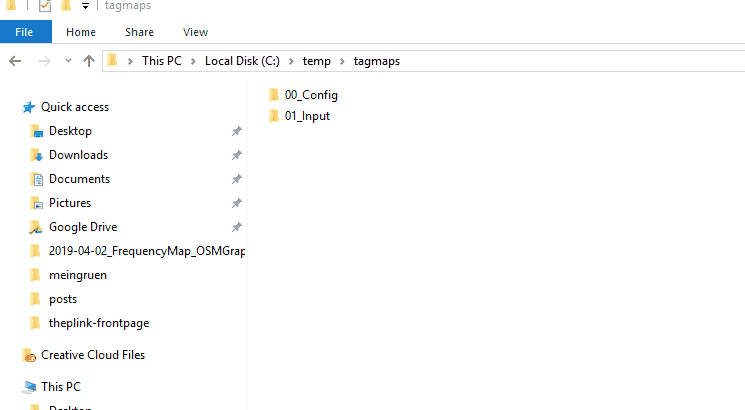
This should start tagmaps process the example file in 01_Input subfolder using the example config files in 00_Config:
Check results
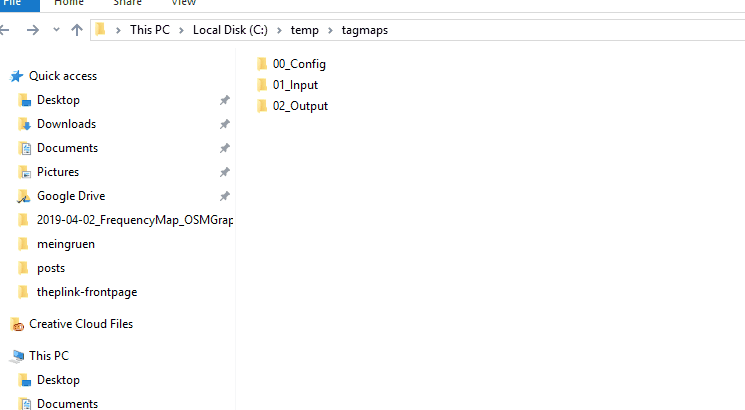
Results will be stored in 02_Output folder:
These shapefiles can be visualized, for example, with ESRI ArcMap. There're *.mxd files provided for the different ArcMap versions on Github Tagmaps resource folder.
Further reading:
- There's a more thorough tutorial available here, which also covers the steps in ArcMap
- Check out this album on Flickr with some more Tag Maps examples
- There's also a semi-interactive interface to explore some Tag Maps here
- Check out my blog here with some background information
- A Jekyll-Reveal presentation on theory & background